


A successful asphalt driveway installation requires more than scheduling a contractor. Minnesota homes experience frost heave, water intrusion, vehicle stress, and shifting subsoil conditions. When prep work is overlooked, even premium asphalt mixes and expert workmanship can underperform, leading to early deterioration or avoidable repairs within the first few years.
This guide outlines essential but commonly forgotten tasks homeowners need to complete before, during, and after asphalt installation. Drawing on Richfield Blacktop’s 60+ years of Minnesota paving experience, we highlight preparation strategies and homeowner responsibilities that protect long-term driveway value.
Why Preparation Matters in Asphalt Driveway Installation
A driveway endures constant stress, including traffic loading, moisture movement, and freeze-thaw cycles. Proper preparation strengthens the foundation beneath the pavement, not just the surface. Missing critical prep steps often leads to drainage failures, poor compaction, longitudinal cracking, and premature resurfacing requirements.
Preparation helps ensure smoother scheduling, better material performance, and immediate protection during curing. Homeowners who understand these expectations strengthen their installation results and minimize repair spending later. Good preparation prevents common installation risks and improves long-term return on investment.
What Homeowners Should Do Before Work Begins
Before crews arrive, homeowners should finalize access, staging, and property clearance. These steps accelerate the installation timeline for the asphalt driveway and prevent site disruption.
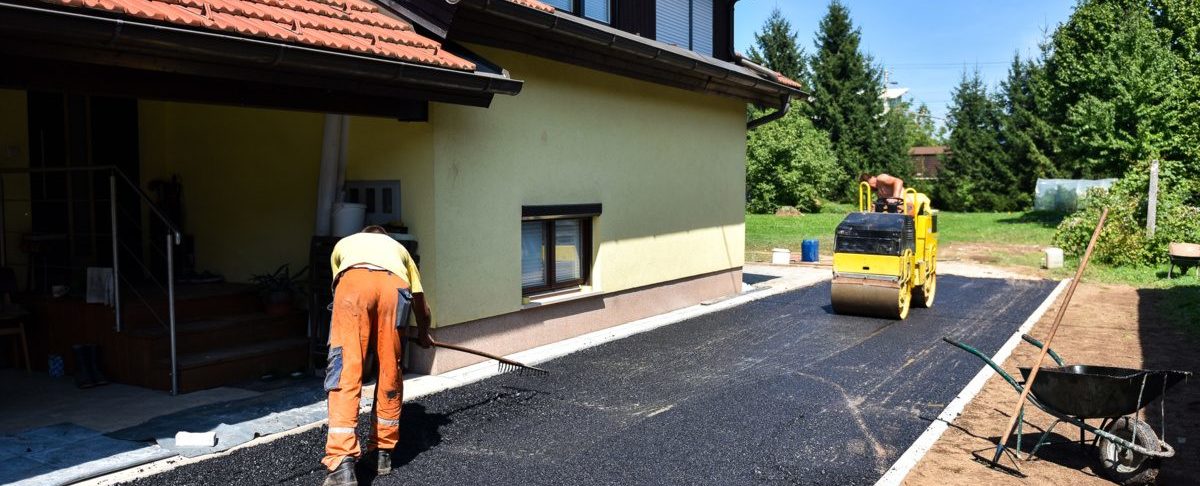
1. Clear Access to the Work Area
Crews require unobstructed space for trucks, rollers, compactors, and debris removal. Tasks include moving all vehicles from the garage and driveway, trailers, boats, or seasonal equipment, and temporary basketball hoops and lawn furniture. Removing obstacles ensures safe equipment access and prevents accidental property damage.
2. Protect Adjacent Landscaping and Utilities
Asphalt driveway paving requires excavation and compaction, which affects nearby surfaces. Homeowners should also flag or remove irrigation sprinkler heads. invisible fencing systems, lighting fixtures, and sensitive edging materials. Taking precautions keeps utilities functional and reduces repair surprises.
Ensuring these initial steps are completed before the crew arrives keeps the project on schedule, helps avoid preventable delays or added costs, and lays the groundwork for a smooth asphalt driveway installation.
Additional Prep Tasks for Asphalt Driveway Replacement Projects
Replacement requires more planning than first-time installation because existing pavement and subsurface conditions must be corrected.
1. Evaluate Subgrade Stability
Minnesota soil expands and contracts, especially following frost cycles. Subgrade instability must be addressed during demolition, not after installation. Thorough subgrade assessment prevents reflective cracking and rutting.
2. Confirm Root and Utility Line Interference
Buried irrigation, communication cables, tree roots, and water lines complicate removal and excavation. Identifying risks before surface removal accelerates installation and eliminates restoration costs.
When these additional considerations are addressed early, asphalt driveway replacement proceeds more efficiently, reduces unexpected complications during excavation, and improves long-term pavement reliability.
Day-of-Installation Responsibilities for Homeowners
The day of installation involves coordinated activity. Even with a full-service contractor, homeowners play an active role on installation day. Knowing what to expect avoids unnecessary interruptions. Homeowners should take responsibility for the following actions to support efficient progress:
1. Confirm parking alternatives for all household vehicles. Vehicles cannot remain in the garage or near access points once equipment staging begins.
2. Restrict access to the work zone for pets and children. Keep household members inside or away from the driveway.
3. Communicate special concerns to the crew lead before work begins. These include tree roots, decorative edging, drainage paths, or desired vehicle access at certain times.
4. Keep garage doors closed unless directed by the crew. Airborne material particles and vibrations from rollers can affect items inside.
5. Plan for temporary noise and vibration throughout the installation window. Rollers, compactors, and asphalt transport trucks generate significant sound and surface vibration.
6. Monitor weather conditions. Verify that both the air and ground temperatures are at least 50°F (10°C) and rising before the crew begins pouring. According to the Asphalt Institute, applying asphalt below this threshold prevents the material from reaching its required density, which can lead to premature surface failure.
A smooth installation day supports a better-performing driveway surface and reduces the likelihood of preventable installation defects.
Common Oversights That Lead to Costly Asphalt Repairs
Even high-quality asphalt installation fails prematurely when surface conditions deteriorate early. Neglect often begins during the first hours and days after installation.
Common oversights include:
- Directing snowmelt runoff toward the driveway
- Placing heavy equipment close to unprotected edges
- Skipping early crack sealing
- Allowing sharp turning or scuffing before curing
- Ignoring early drainage pooling
Preventing these mistakes safeguards new pavement and reduces premature resurfacing or crack repairs.
Checklist: Dos and Don’ts to Prevent Damage After Installation
The first year matters most. Even the highest-quality asphalt remains vulnerable while it finishes stabilizing and curing. Surface scuffing, edge crumbling, rutting, oil penetration, and early cracking typically occur because of preventable homeowner habits, not flaws in installation. By following proper post-installation care guidance, homeowners can preserve long-term pavement performance and protect their investment.
Post-Installation Dos and Don’ts
Follow this homeowner checklist for DO’s to protect your new surface during the curing stage:
- Allow required curing time before parking or storing vehicles
- Keep heavy equipment and trailers, or dumpsters, off the driveway
- Sealcoat only when recommended by your contractor
- Monitor for standing water and report drainage concerns
Just as certain protective actions improve longevity, other habits may trigger early surface damage and shorten the driveway’s expected lifespan. Follow this homeowner checklist for DON’Ts:
- Don’t place planters, bricks, or edging near the driveway edge
- Don’t use harsh deicers on fresh asphalt
- Don’t allow snow plows to scrape aggressively near the edges
- Don’t delay crack sealing until the first signs of wear
- Don’t park large trucks or RVs until contractor approval
Proper care during the first year helps asphalt harden evenly, maintain edge integrity, and resist cracking through Minnesota’s freeze-thaw cycles. Neglecting these precautions can shorten the lifespan of your asphalt driveway, increase maintenance costs, and accelerate the need for resurfacing or replacement.
Why Work With Experienced Minnesota Paving Contractors
Minnesota freeze cycles demand specialized installation methods. Local experience ensures proper grading, base depth, compaction standards, and curing schedules.
Proven Advantages of Professional Installation
Installing an asphalt driveway involves more than spreading and compacting hot mix. Our asphalt paving crews in the Twin Cities bring technical experience, calibrated equipment, and tested methods that homeowners cannot replicate with DIY solutions or unqualified contractors. Professional asphalt installation teams provide:
- Engineered subgrade preparation
- Drainage and slope planning
- Correct mix temperature and compaction
- Equipment sequencing for uniform density
- Accountability for workmanship
When trained crews manage the process, homeowners benefit from improved durability, predictable curing, and long-term structural performance rooted in proven best practices. Moreover, local expertise ensures the surface performs long-term rather than requiring frequent repairs or early replacement.
Richfield Blacktop’s Asphalt Driveway Installation Timeline
Richfield Blacktop follows a documented installation process that improves performance and provides predictable scheduling for homeowners. The timeline varies by weather, excavation depth, and project complexity, but generally includes these phases:
- Removal of existing driveway surface
- Subgrade evaluation and adjustments
- Base layer installation and compaction
- Grading for drainage and slope protection
- Asphalt paving and rolling sequence
- Surface finishing and transition edges
- Cooling period before driveway use
These structured steps ensure proper bonding, compaction, drainage management, and surface durability. Understanding the timeline helps homeowners coordinate parking, access, and post-installation care before work begins.
Plan Your Asphalt Driveway Installation With Confidence
Preparing for asphalt driveway installation is just as important as the paving itself. When homeowners anticipate access restrictions, drainage needs, surface protection requirements, and curing schedules, they set the stage for long-term driveway performance. Taking a proactive approach during the planning and installation phases reduces the risk of premature wear and costly repairs, especially in Minnesota’s demanding freeze-thaw climate. To begin planning your asphalt driveway installation, contact Richfield Blacktop today and gain clarity on project timing, prep requirements, installation timeline expectations, and long-term maintenance considerations. Our structured installation process, informed by more than six decades of regional experience, ensures your driveway is engineered for durability from the ground up.